- All
- Product Name
- Product Keyword
- Product Model
- Product Summary
- Product Description
- Multi Field Search

Views: 0 Author: Site Editor Publish Time: 2025-07-10 Origin: Site


You use circlip pliers by gripping and manipulating circlips safely and efficiently. Choosing the right type of circlip pliers for your task makes a big difference in both safety and results.
Using the correct tool not only prevents damage but also improves speed and accuracy in many fields:
1. Automotive repairs become faster and more precise.
2. Brake servicing downtime drops.
3. Suspension and steering work gets easier.
4. Axle maintenance runs smoother.
5. Assembly lines operate with fewer errors.
6. Aerospace technicians maintain strict safety standards.
7. Heavy machinery experiences fewer failures.
8. Electronics remain undamaged during repairs.
Most beginners find the process straightforward when they follow clear steps and use the right equipment.
Choose the right circlip pliers type—internal for inside bores and external for shafts—to ensure safe and effective work.
Always prepare your workspace with good lighting and wear safety glasses to protect against flying circlips.
Insert the plier tips fully into the circlip holes, then carefully expand or compress the circlip before installing or removing it.
Check that the circlip sits fully in its groove after installation to prevent part failure and ensure safety.
Maintain your circlip pliers by keeping them clean, inspecting tips for wear, and using penetrating oil to loosen stuck circlips.

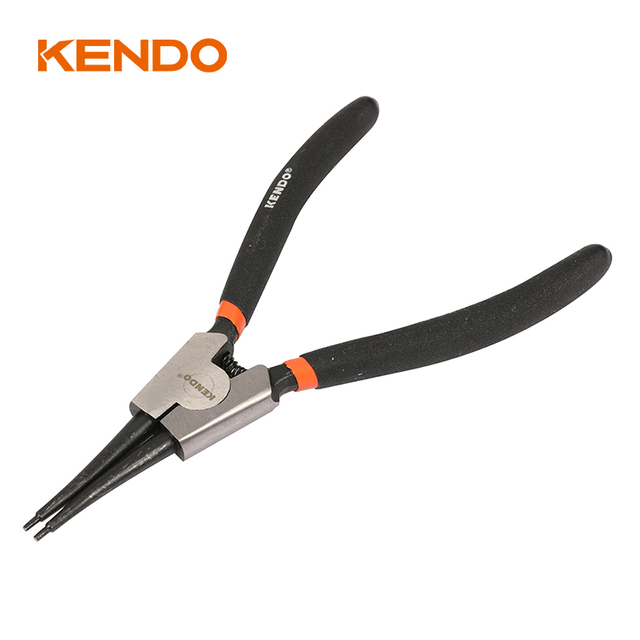
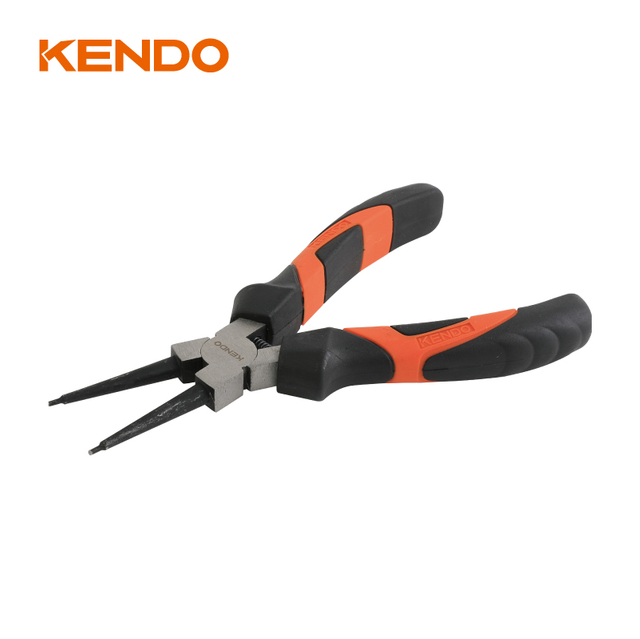
You use snap ring pliers to install and remove circlips, which are also called retaining rings. These fasteners hold parts in place on shafts or inside bores. Snap ring pliers have thin, tapered tips that fit into the holes of circlips. You can find these tips in straight or 45-degree bent shapes, which help you reach tight or awkward spots. Most snap ring pliers are made from strong materials like chrome vanadium steel or high carbon steel. This makes them durable and long-lasting. The handles often have a plastic coating that gives you a comfortable, non-slip grip. Curved jaws on snap ring pliers help you control the circlip with precision. You will see snap ring pliers used in many fields, such as automotive repair, machinery maintenance, and electronics.
Tip: Always choose snap ring pliers with ergonomic handles if you plan to use them for long periods. This reduces hand fatigue and improves your control.
Snap ring pliers come in two main types: internal and external. Each type serves a different purpose.
Internal snap ring pliers help you install or remove circlips inside a bore or housing. You insert the plier tips into the circlip holes, squeeze the handles, and the jaws expand the circlip. This lets you fit the circlip into the groove inside the bore.
External snap ring pliers work on shafts. You use the plier tips to compress the circlip, making it small enough to slide over the shaft. When you release the handles, the circlip expands and locks into the groove on the shaft.
Here is a table to help you see the differences:
Aspect | Internal Snap Ring Pliers & Circlips | External Snap Ring Pliers & Circlips |
|---|---|---|
Positioning | Inside a bore or hole | Outside a shaft |
Installation | Expand circlip to fit into bore groove | Compress circlip to fit over shaft |
Shape | Larger internal diameter, expands outward | Smaller external diameter, expands outward |
Function | Holds parts inside a bore | Holds parts on a shaft |
Uses | Engines, transmissions, inside housings | Shafts, bearings, outside mechanical systems |
Some snap ring pliers have interchangeable tips or angled jaws. These features help you work in tight spaces or on different sizes of circlips. Always inspect the groove and choose the right snap ring pliers for your task. This ensures a secure fit and prevents damage.
Choosing the right tools makes your job easier and safer. When you select snap ring pliers, pay attention to the type and size you need for your task. You use internal snap ring pliers for circlips inside bores or housings. You use external snap ring pliers for circlips on shafts. Some jobs require straight tips, while others need bent or angled tips to reach tight spaces. Bent tips, often at 45° or 90°, help you work in confined areas.
Look for snap ring pliers with these features:
Tips made from high-density spring steel wire for durability and long life.
Bolted joint design for smooth, precise movement.
Non-slip plastic-coated handles for a secure grip.
Large contact surfaces on the tips to prevent circlip distortion.
Interchangeable tips for switching between straight and angled options.
Compliance with standards like DIN 5256 D for quality assurance.
A snap ring plier set often includes tools for both internal and external circlips, covering a range of sizes. This gives you flexibility for different jobs in automotive, electrical, plumbing, or industrial work. Always match the pliers and circlip size to the shaft or bore you are working on.
Tip: Use a snap ring plier set with multiple sizes and tip shapes to handle most repair tasks.
Safety should always come first when you use snap ring pliers. Start by setting up your workspace. Make sure you have good lighting and a clean, stable surface. Wear safety glasses to protect your eyes from flying circlips. Gloves can help protect your hands, but make sure they do not reduce your grip.
Before you begin, inspect the circlip and the groove. Check for rust, dirt, or damage. A damaged circlip or groove can cause the snap ring to slip or break. Clean the area if needed. Make sure the snap ring pliers are in good condition, with no worn or bent tips.
Always keep your hands and face away from the path of the circlip.
Hold the snap ring pliers firmly and keep steady control.
Cover the circlip with a cloth or your hand when removing it to prevent it from flying off.
Note: Never force a circlip into place. If it does not fit easily, check the size and condition of both the circlip and the groove.
Start by selecting the correct snap ring pliers for your task. Make sure you match the pliers to the type and size of the circlip. Hold the pliers so the tips align with the holes on the circlip. Gently insert the tips into the holes. For internal circlips, position the pliers inside the bore. For external circlips, place the pliers outside the shaft. Always check that the tips are fully engaged in the holes before you apply pressure. This step prevents the pliers from slipping and keeps the circlip from flying off.
Tip: Cover the circlip with a cloth or your hand during this step. This simple action protects you if the circlip slips or pops out unexpectedly.
Once you insert the snap ring pliers into the circlip, you need to either expand or compress the ring. The technique depends on the type of circlip:
Internal Circlips: Squeeze the handles to expand the circlip. The jaws will push outward, making the circlip large enough to fit into or out of the groove inside a bore.
External Circlips: Squeeze the handles to compress the circlip. The jaws will pull inward, making the circlip small enough to slide over or off a shaft.
Keep steady control as you squeeze the handles. Avoid using excessive force, which can bend or break the circlip. Make sure the pliers stay straight and the tips remain fully seated in the holes.
For snap ring installation, position the expanded or compressed circlip over the groove. Carefully move the circlip into place. Release the handles slowly to let the circlip settle into the groove. For removal, reverse the process. Expand or compress the circlip, then lift it out of the groove and away from the shaft or bore.
Internal Circlip Installation: Expand the circlip, insert it into the bore, and release the handles so it snaps into the groove.
External Circlip Installation: Compress the circlip, slide it over the shaft, and release the handles to let it expand into the groove.
If you encounter a stuck or rusted circlip, apply a small amount of penetrating oil to loosen rust between the circlip and the groove. Wait a few minutes for the oil to work. If the circlip remains stuck, gently tap it with a center punch to break the rust bond. Always clean the groove thoroughly after removing a circlip. Replace any worn or rusted circlips with new, application-specific ones to prevent future failures.
Note: Using the correct snap ring pliers matched to the circlip type and size helps you avoid damage during snap ring installation and removal.
After you insert the circlips, always check that the ring sits fully in the groove. This step is critical for safety and reliability. Improper assembly or failure to ensure the circlip is fully seated can cause premature failure of the circlip and the parts it holds. Circlips that are worn, rusted, or damaged lose their function and increase the risk of failure.
Follow these steps to verify security:
Select the correct circlip size to match the groove dimensions.
Use proper snap ring pliers to install the circlip without bending or damaging it.
Visually inspect the circlip to confirm it sits evenly and fully in the groove.
Check for adequate clearance so the retained component moves freely.
Perform a gentle functional test to ensure the circlip remains secure during operation.
Always clean the groove before installation.
Replace any damaged or worn circlips.
Never reuse a circlip that shows signs of wear or corrosion.
Reminder: Cleaning the groove and ensuring the circlip is fully seated after installation prevents mechanical failures and keeps your equipment running safely.
Step | Internal Circlip | External Circlip |
|---|---|---|
Insert plier tips | Inside circlip holes (in bore) | Outside circlip holes (on shaft) |
Squeeze handles | Expand circlip | Compress circlip |
Position circlip | Into bore groove | Over shaft groove |
Release handles | Circlip snaps into groove | Circlip expands into groove |
Check security | Ensure full seating | Ensure full seating |
How to use snap ring pliers: Always keep steady control, ensure the tips are fully engaged, and cover the circlip to prevent it from flying off. If you follow these steps, you will master snap ring installation and removal with confidence.
When you use snap ring pliers, you may face some common problems. Knowing these issues helps you avoid mistakes and work more safely.
If you do not seat the tips of your snap ring pliers fully into the circlip holes, the circlip can fly off. This can cause injury or make you lose the part. Always cover the circlip with a cloth or your hand when removing it.
You might break a circlip if you use too much force or the wrong size snap ring pliers. Old or rusted circlips also break easily. Replace damaged circlips before you start your repair.
Snap ring pliers can slip out of the circlip holes if you do not keep steady pressure. Using pliers with worn or bent tips also increases this risk. Make sure your tools are in good condition and fit the circlip size.
Sometimes, the groove is too tight for the circlip. Forcing the snap ring pliers can damage both the tool and the part. Clean the groove and check for debris before you try again.
Use the correct snap ring pliers for the job. Internal and external snap ring pliers are not interchangeable.
If a circlip is stuck, apply a small amount of penetrating oil. Wait a few minutes, then try again.
For rusted or damaged circlips, use a center punch to loosen them before removal.
Keep your snap ring pliers clean and dry. Lubricate the pivot joint to ensure smooth operation.
Inspect the tips of your snap ring pliers often. Replace them if they show signs of wear or bending.
Tip: Regular maintenance of your snap ring pliers extends their life and improves your safety.
Problem | Solution |
|---|---|
Circlip flies off | Cover with cloth, check tip engagement |
Circlip breaks | Use correct size, replace damaged circlips |
Pliers slip out | Maintain steady pressure, inspect tool tips |
Groove too tight | Clean groove, avoid forcing the circlip |
You can use circlip pliers safely and effectively by following a few key steps:
Select the right pliers and circlip for your task.
Prepare your workspace and wear safety gear.
Insert the plier tips into the circlip holes.
Expand or compress the circlip as needed.
Install or remove the circlip, then check its security.
Practice these steps often. Careful tool selection and safety checks help you achieve the best results every time.
You choose internal pliers for circlips inside a bore. You use external pliers for circlips on a shaft. Always match the plier tip size to the circlip holes for a secure grip.
You should not use regular pliers. Circlip pliers have special tips that fit circlip holes. Regular pliers can slip and damage the circlip or the part. Always use the correct tool for safety.
Apply a few drops of penetrating oil to the circlip. Wait a few minutes. Use the correct circlip pliers to try again. If it remains stuck, gently tap it with a center punch to loosen it.
You should replace circlips after removal. Old circlips can lose tension or become damaged. New circlips ensure a secure fit and reduce the risk of failure.
Wear safety glasses to protect your eyes from flying circlips. Use gloves for hand protection, but make sure you can grip the pliers securely. Keep your workspace clean and well-lit for best results.