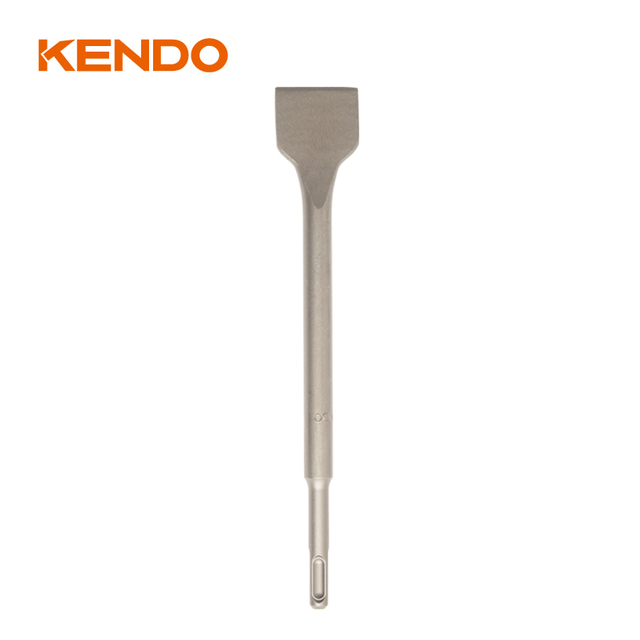
- All
- Product Name
- Product Keyword
- Product Model
- Product Summary
- Product Description
- Multi Field Search

Views: 0 Author: Site Editor Publish Time: 2025-09-16 Origin: Site


You need a sharp chisel to cut wood well. A sharp chisel is very important for good work. Sharp chisels cut wood fibers cleanly. This gives you neat and accurate cuts. You will fix fewer mistakes. Many woodworkers say sharpness is more important than the cutting angle. Sharpen your chisel often to work safely. This also makes each project easier. Brands like Kendo make good chisels and sharpening tools. These tools are great for beginners and experts.
Always use a sharp chisel for good cuts. Keep your chisel sharp so it works well.
Pick the right chisel for your job. Each chisel has a special use, so choose one that fits your work.
Hold your wood with clamps or a vise. Keeping it steady makes it safer and helps you cut better.
Use a marking knife to make clear lines. This helps guide your chisel and stops wood from breaking.
Use good cutting methods, like cutting with the grain. Make light cuts to get the best results.

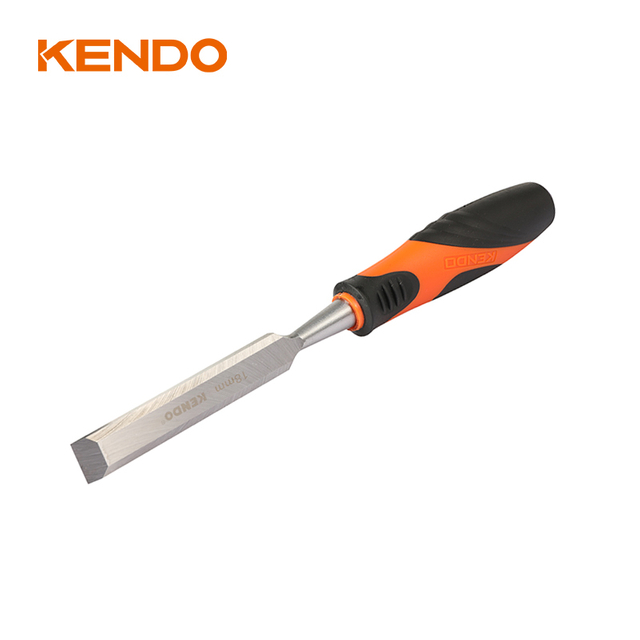
Selecting the right chisel helps you work faster and safer. You want a tool that feels good in your hand and stays sharp. Kendo chisels stand out because they use a dual-layered blade structure. This design combines a hard steel edge with a softer iron backing, making sharpening easier and improving durability. The concave back design also helps you keep the edge sharp and stable. Handles made from hardwood with steel reinforcements prevent splitting, so you can trust your chisel for tough jobs.
Tip: Always choose a chisel that matches your project. For example, a bench chisel works well for dovetail joints, while a mortise chisel is best for chopping mortises.
Here is a quick guide to common types of chisels and their uses:
Chisel Type | Specifications | Applications |
|---|---|---|
Bench chisel | 25° beveled edge | Dovetail and mortise-and-tenon joints |
Mortise chisel | 30° bevel, 90° edge | Chopping mortises for joinery |
Paring chisel | Low primary bevel (e.g., 17°) | Paring end grains and softwoods |
Butt chisel | Wider blades, short length | Carving mortises for butt hinges |
A guide block helps you make straight and accurate cuts. Place a square block of wood next to your chisel. Slide the block until the back of the chisel sits flat against it. Make sure the bottom of the block is flat on your workpiece. This setup keeps your chisel at a perfect 90° angle. You get better control and cleaner results.
A guide block is versatile and easy to use.
It helps you square up small pieces and get a smooth finish.
You can also use it to bevel or chamfer edges quickly.
Securing your workpiece is important for safety and accuracy. Use clamps or a vise to hold the wood steady. If your workpiece moves, you might slip and hurt yourself. A stable setup lets you focus on making precise cuts with your chisel. Always check that your wood does not shift before you start working.
Note: A well-positioned workpiece helps you avoid mistakes and keeps your hands safe.
Sharp chisels help you cut wood neatly and accurately. When your chisel is sharp, you avoid splinters. You also get better results. Dull chisels can slip or get stuck. This can make injuries more likely. Always check your chisel before you start a project.
You need to sharpen your chisel the right way. There are different ways to sharpen a chisel. You can use grinding, flattening, honing, lapping, and stropping. Stropping with leather fixes small problems. It keeps the edge very sharp. Try the Paper Test before using your chisel. If it cuts paper easily, it is sharp enough. If it rips the paper, strop it again.
Tip: Kendo sharpening tools make sharpening easier. These tools help you keep your chisel sharp with less work.
Sharpen your chisel when it feels dull. Many woodworkers sharpen once a month. They hone every two weeks. Regular care stops your tools from wearing out fast. You can watch Paul Sellers on YouTube for tips. You can also read 'Sharpen This' by Lost Art Press.
Key steps for sharpening:
Grind the bevel to the right angle.
Flatten the back of the chisel.
Hone the bevel for a sharp edge.
Lap the bevel to make it smooth.
Strop the bevel to finish.
The bevel angle changes how your chisel cuts. Keep the bevel the same for best results. Use a sharpening guide to help with the angle. Here is a table with bevel angles and their uses:
Bevel Angle | Application | Effect on Performance |
|---|---|---|
20 degrees | Paring chisels | Sharper edge, not as strong |
25 degrees | General use | Good mix of sharpness and strength |
30 degrees | Mortising chisels | Stronger edge, not as sharp |
Honing often keeps the bevel sharp. You do not need to sharpen as much. This saves you time and money. Well-cared-for bevels give clean cuts. They also make your tools last longer. You lower the chance of accidents. You get better results in every project.
Advantage | Description |
|---|---|
Clean and precise cuts | Regular care gives better quality. |
Longer sharpness | Honing keeps chisels sharp for longer. |
Reduced accident risk | Good tools are safer to use. |
Less frequent sharpening | Sharp chisels need less work. |
Time-saving on maintenance | Good tools save you time. |
Extended tool life | Care makes chisels last longer. |
Cost savings | You buy fewer new chisels. |
Longevity | Good care can make chisels last 10 years. |
Note: Always wear safety goggles. Secure your wood before sharpening or using your chisel.

Sharp chisels help you achieve clean cuts and high precision. You need a razor-sharp edge for the best results. Always check your cutting edge before you start. Sharp tools make every technique easier and safer.
You can test your chisel's cutting edge with a simple sheet of paper. Hold the paper and try to cut through it with your chisel. If the edge slices cleanly, your chisel is sharp. If it tears or snags, you should use a sharpening method to restore the edge.
Keep a sharpening stone or strop nearby. Use short strokes to hone the bevel and maintain a sharp cutting edge. Regular sharpening saves time and keeps your chisel ready for precision work.
You must secure your workpiece before making cuts. Never hold wood with one hand while using a chisel with the other. Use clamps or a bench vise to keep your project steady. This technique protects your hands and helps you control the cutting edge for accurate cuts.
Always clamp your work securely.
Use a vise or benchtop for extra stability.
A marking knife gives you a precise line for your chisel. The knife creates a barrier that guides your cutting edge and prevents tearout. Pencil marks can be too wide and lead to mistakes. For tight joinery, use a knife to mark your lines and improve precision.
Knife lines help tools follow the exact path.
Knife marks stop wood fibers from tearing.
For critical cuts, knife marks are more accurate than pencil lines.
Efficient waste removal is key to clean cuts. Place the bevel of your chisel facing the waste side. Tap with a mallet to cut about 1/8" deep. Angle the cutting edge into the joint for less compression. Make a penultimate cut close to the shoulder line for finer results.
Technique Description | Source |
|---|---|
Place the bevel facing the waste and cut 1/8" deep. Angle the chisel for less compression. | David Charlesworth |
Make a cut close to the shoulder line for finer results. | David Charlesworth |
Clamp a block along the mark to guide the chisel for a clean cut. | Brian Holcombe |
Make a deeper cut with a knife into the gauge line before chiseling. | Steve Voigt |
Flip your wood and use your chisel from both sides. This technique helps you avoid splintering and keeps your cutting edge sharp. You get better precision and cleaner cuts.
Hold your chisel close to the cutting edge. Your fingers act as a brake and depth stop. This grip gives you more control and safety. Always cut away from your body and hands.
Hold the chisel like a pencil for accuracy.
Position fingers near the cutting edge for control.
Use the largest chisel that fits inside the line for tight corners. Swivel the cutting edge into the corner to avoid bruising edges. Leave a bit of material and use the back of the chisel as a reference. For dovetails, a fishtail chisel works well in narrow spaces.
Grain direction affects your cuts. Cutting against the grain can lift and rip fibers, causing tearout. Always check the grain before you use your chisel. Cutting along the grain gives you smooth, clean cuts and better precision.
Grain orientation changes how your cutting edge interacts with wood.
Mortise walls and tenon cheeks respond well when you follow the grain.
Sharp tools and proper technique help you avoid tearout. Always use a sharp cutting edge and pay attention to grain direction. Try slicing cuts by angling your chisel. This method reduces tearout and gives you clean cuts.
Use sharp chisels for clean cuts.
Slice at an angle to minimize tearout.
Choosing the right bevel orientation improves your technique. Use bevel down for better control during cutting, especially for paring and flattening. Bevel up works well with secondary bevels for certain cuts.
Bevel Orientation | Advantages | Disadvantages |
|---|---|---|
Bevel Down | Better control for paring and flattening | Can be tricky with hollow grinds in thin stock |
Bevel Up | Easier with secondary bevels for some cuts | Less control for horizontal cuts |
Tip: Practice each technique to master your chisel skills. Precision comes with experience and attention to detail.
Tear-out can ruin your woodworking project. You want to keep your cuts clean and smooth. Here are steps you can follow to prevent tear-out when using your chisel:
Select wood with straight grain. This type of wood gives you predictable results.
Read the grain direction before you start. Grain direction affects how your bevel interacts with the wood.
Always use a sharp chisel. A sharp edge slices through fibers instead of ripping them.
Choose the right tool for each cut. The correct bevel angle helps you control the cut.
Take light passes. Deep cuts can cause tear-out, especially if your bevel is too steep.
Support your workpiece with a backer board or sacrificial fence. This support keeps fibers from lifting.
Pre-chamfer edges where tear-out might happen. A small bevel on the edge protects the surface.
Score your cut line with a marking knife. This step creates a guide for your bevel and reduces splintering.
Apply tape or shellac to hold fibers in place. These materials help your bevel glide smoothly.
Use high-angle tools or scrapers for tricky grain. A steeper bevel can help you manage difficult spots.
Sand the area if you see minor tear-out. Sanding blends the surface and hides small mistakes.
Tip: Always check your bevel before each cut. A well-maintained bevel gives you better control and cleaner results.
Mistakes happen, even when you work carefully. If your chisel slips, you can fix the problem and keep working. Follow these steps to repair a slip:
Look at the damaged area. Check if your bevel or edge needs attention.
If the bevel is chipped, regrind it to restore the shape. Use a grinding tool and keep the bevel angle steady.
Position your chisel correctly on the grinding platform. This step helps you maintain a flat bevel.
If you need better access, adjust the socket of your chisel. This adjustment lets you reach the bevel easily.
Use a file to reshape the bevel. Keep the top parallel to the bottom for a balanced edge.
Finish with a flat diamond stone. This tool smooths the bevel and prepares your chisel for use.
Note: Always wear safety goggles and keep your hands away from the blade. A safe setup protects you from injuries.
Common mistakes include dull edges, loose workpieces, and damaged handles. You can avoid these problems by sharpening your bevel, securing your wood, and inspecting your tools before each project.
You can make clean and accurate cuts by following a few simple steps. Always create a burr on your bevel, then lap the back and refine the edge with higher grit stones or stropping. Remember these tips:
Check your chisel with the paper sharpness test.
Start with small projects to build confidence.
Practice safety and joinery techniques.
Make controlled cuts and follow the wood grain to avoid tearout.
Maintain your bevel for long-lasting performance.
Quality tools like Kendo help you achieve great results. Practice often and watch your skills grow!
You should use regular honing and proper sharpening methods. A sharp chisel gives you clean cuts and better precision. Try the paper test to check for a razor-sharp edge. Always follow a consistent sharpening process for the best results.
You can avoid tearout by using sharp chisels and the right technique. Always cut with the grain and use a marking knife. Support your workpiece and use light cuts. This method helps you get smooth, clean cuts every time.
The bevel angle depends on your project. For general woodworking, use a 25-degree bevel. Paring chisels need a lower angle for a razor-sharp edge. Mortise chisels work best with a 30-degree bevel. Keep the angle steady during the sharpening process.
You should sharpen your chisels when you notice the cutting edge feels dull or your cuts lose precision. Regular honing between sharpening sessions helps maintain a sharp chisel. This method extends the life of your tools and keeps your work clean.
Start with simple sharpening methods like using a sharpening stone or honing guide. These tools help you keep the bevel steady and create a razor-sharp edge. Practice the sharpening process often to improve your technique and get clean cuts.